Before Nails, There Was Pegged Wood Construction
I’ve always been fascinated by how people did things in olden times before they had the technology we have available to us today – to look back on the amazing craftsmanship that has existed throughout history and wonder how people actually accomplished the things that they did by using the methods they were limited to. In many ways, the craftsmanship of those ancient artisans far surpasses what we do today with all our modern tools.
As a woodworker (that’s my hobby), I’ve always had a special interest in how carpenters and cabinetmakers of old applied their craft. While I don’t really have the patience to forego my power tools and follow their ancient ways, I have tried out a number of them just for the learning experience.
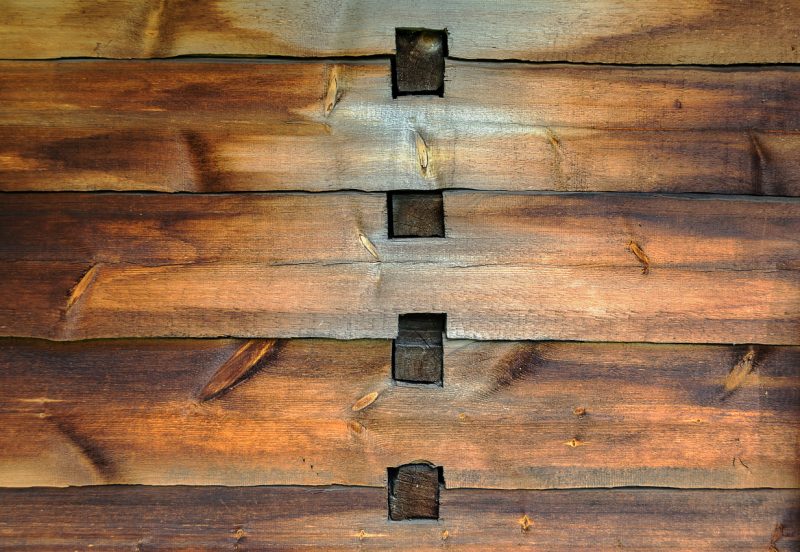
Before nails were invented, carpenters, furniture makers, shipbuilders, and cabinetmakers still had to join pieces of wood together. Wood glue was used (horsehide glue), but that wasn’t enough. Glue alone won’t hold pieces of wood together, especially when you have to glue to the end grain. Some means of mechanical fastening is needed to give the finished piece strength.
An answer to this, used for centuries, was pegged construction. Pegs are round wooden dowels that pass through the joints in boards, providing a “bridge” of strength between the two pieces while helping to hold them together. Depending on the design of the particular piece, the peg could be used in conjunction with other joining techniques like glue or a mortise and tenon.
Early Nails
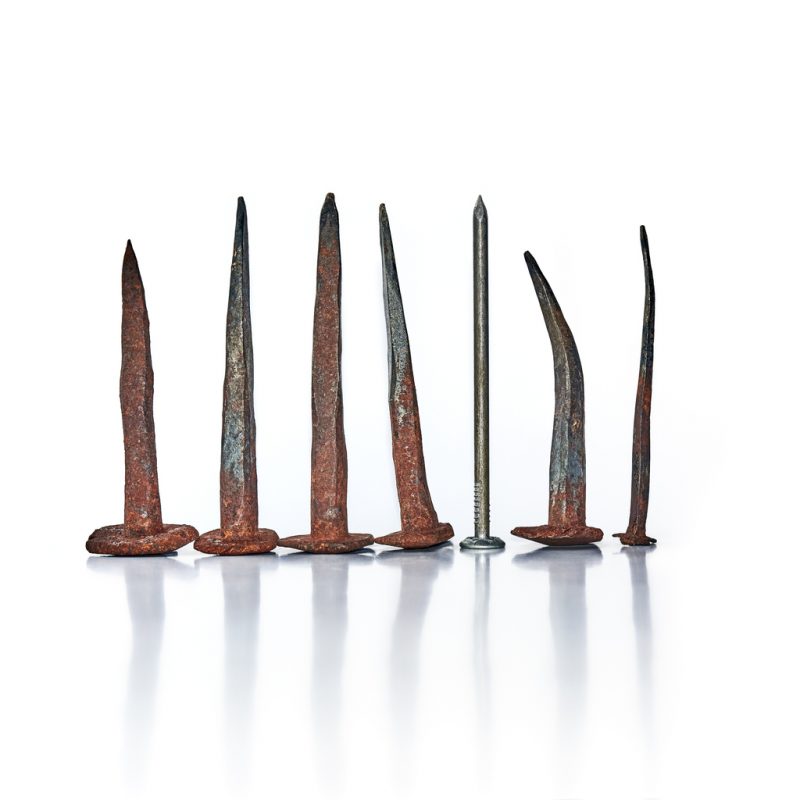
Even when nails became available, professional woodworkers shunned them, saying that they were a convenience item and weren’t for serious work. There was some validity in their comments, as those early nails were hand-made by blacksmiths. Nails were the kind of thing they would make while sitting and talking around the fire in the evening.
Those hand-made nails were extremely crude by today’s standards. They were formed out of square bar or rectangular stock, which was between 1/8 and 1/4 inch thick. The blacksmith would hammer the nail, tapering it nearly to a point, then they would bend over the stock to form a head. Finally, they would cut the bar stock off and leave a tang of about 3/8 inch for the head.
In some cases, a roughly round head was created on the nail by heating it in the forge and then hammering the head end of the nail, disrupting the material to form a circle that spread beyond the width of the original stock. These heads would range from 1/2 inch to 3/4 inch in diameter.
While functional, the tapered design of these nails had more of a tendency to pull out than modern nails because once the spring tension of the wood on the sides of the nails started to relax, the tapered design made it easy for the nail to slip out of the hole.
Working with Pegs
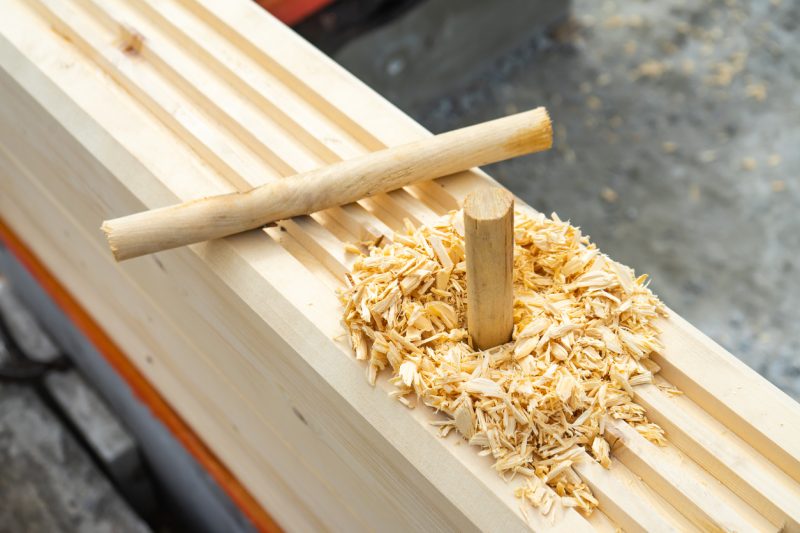
Today, if you want to make a pegged piece of furniture, you go to the lumber yard or hardware store and buy a bag of fluted dowel pins. These are two-inch-long pieces of dowel rod that have been tapered on the ends and run through a die that makes grooves in the sides. They are available in sizes ranging from 1/4 inch to 1/2 inch in diameter.
But this hasn’t always been the case. In olden times, the woodworker hand-carved the peg out of wood, often using pieces of branches that were too small to use for anything else. These pegs ranged from 1/2 inch to 1 inch in diameter and could be several inches long. Being hand-whittled, they were intentionally left with a rough surface so they would jam into the hole the woodworker drilled for them.
Once the pegs were made, the woodworker could then select the right size bit for their brace in order to make holes in the workpiece. These were often holes all the way through, but for fine furniture the hole would be made from the hidden side and stopped before it pierced the visible side of the workpiece.
Once the hole was made, the peg was pounded into it with a mallet and the end cut off. In some cases, glue would be used in conjunction with the peg, but furniture could also be joined together strictly with pegs and no glue.
My dad, who was an incredible woodworker, made his workbench in this way. It was all pegged, and the pegs were left sticking out and not cut off. This was intentional as it allowed him to break the workbench down to move it simply by removing a few pegs. Yet, once pegged together, it was as stable and sturdy as any workbench you could imagine.
Pegs with Mortise & Tenon
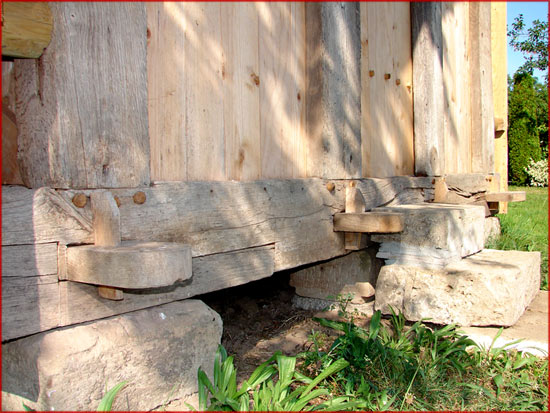
While pegs were often used alone, they could also be used in conjunction with a mortise and tenon for added strength. The mortise and tenon is an incredible means of joining wood pieces together and utilizes the natural strength of the wood to great advantage.
On the simplest level, a mortise is a square (or rectangular) hole in a piece of wood. A tenon is the end of the board that is going to connect to it at a right angle. Typically, the end is cut down to create a shoulder and make the part that enters into the mortise smaller. This is usually necessary to ensure that there is enough material all the way around the mortise to maintain structural strength.

Now, here’s how a pin can be used with this. Typically, the tenon is made a little long, and then once it is joined to the mortise the extra material is cut off. When a pin is used in conjunction with the mortise and tenon, a longer tenon is cut to leave enough material in which to drill a hole for the peg.
The peg must sit snug up against the side of the board when the tenon is inserted into the mortise. Obviously, this is a smaller peg as it has to pass through the tenon. Careful measurement and drilling are essential to making this work, but if it is done properly, the joint will hold as solid as if it were permanently joined – even without using glue to hold the pieces together.
This is ideal if you want to make furniture or farm implements that can be broken down for movement or modified for different tasks. The peg holds the mortise and tenon joint tightly together, but that’s all it is expected to do. It is the mortise and tenon joint that is providing the structural strength to the project.
Using Peg Construction in a Survival Situation
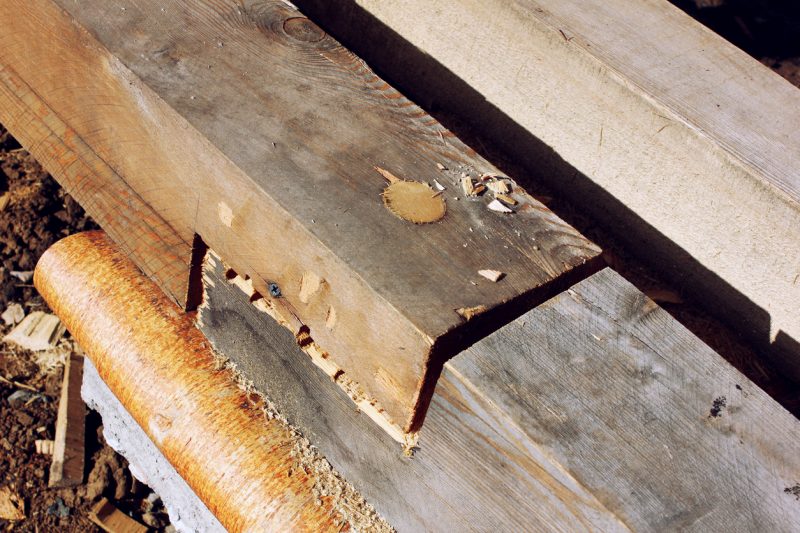
Once you learn how to do it, peg construction is actually extremely easy to do – although it does take longer than building with nails or screws. You can build just about anything you can think of this way, from furniture and farm implements to a home. What this means is that in a post-disaster world where you might have trouble getting your hands on screws and nails, you could still build anything you need.
You will need some special tools, though. I mentioned that the pegs were “whittled,” but in reality they were cut with a drawknife. While you can whittle them with a knife, a drawknife will be quicker.
You’ll also need a brace with a set of bits. If things are ever at the point where you need to build with pegged construction, you can be sure that your cordless drill isn’t going to be working.
Finally, if you are going to combine pegs with mortise and tenon joints, you’re going to need a fine-tooth, crosscut back saw and chisels. The mortise itself is started by drilling a hole and then squaring it out with a chisel.


