Having fire and making some light is an important survival skill, this isn’t just a way of brightening up an area but of having fire as well, it’s a good fire source for starting other fires. Pine resin is also a great glue when mixed with the right ingredients.
I’ve got some here in the Outdoor Revival HQ that can be used for fire lighting when I’m off on a wander, it’s easy to collect and store.
“Here’s the scenario: You are stranded in one of the vast forests of the northern hemisphere, it’s winter, it’s cold and you have only a half an hour until the sun sets when you realize you have to walk 3 more hours to safety, the terrain is too dangerous to walk in the darkness and to wait until morning could be very dangerous, possibly fatal, because of hypothermia. Even if you could construct some kind of a shelter you think it’s still too cold to be out for the night, the bottom line is that you need to make some kind of a torch from materials that are common in the forest, you’ve got to light your path, using the tools you have, and walk out of the woods at night.”
That’s the Challenge given to Stvnishire and here’s his response. A big thanks to Stvnishere for the article
Step 1: Tools and Materials
Materials I used:
Pine resin as fuel – resin circulates throughout the pine tree and serves to seal the wounds from pathogens when the tree is damaged (even superficially), that’s why you can find pine resin anywhere you can find pine trees and basically you can find pine trees anywhere you can find a forest, with more than 120 species within the Pinus genus they’re the most widespread trees on the northern hemisphere.
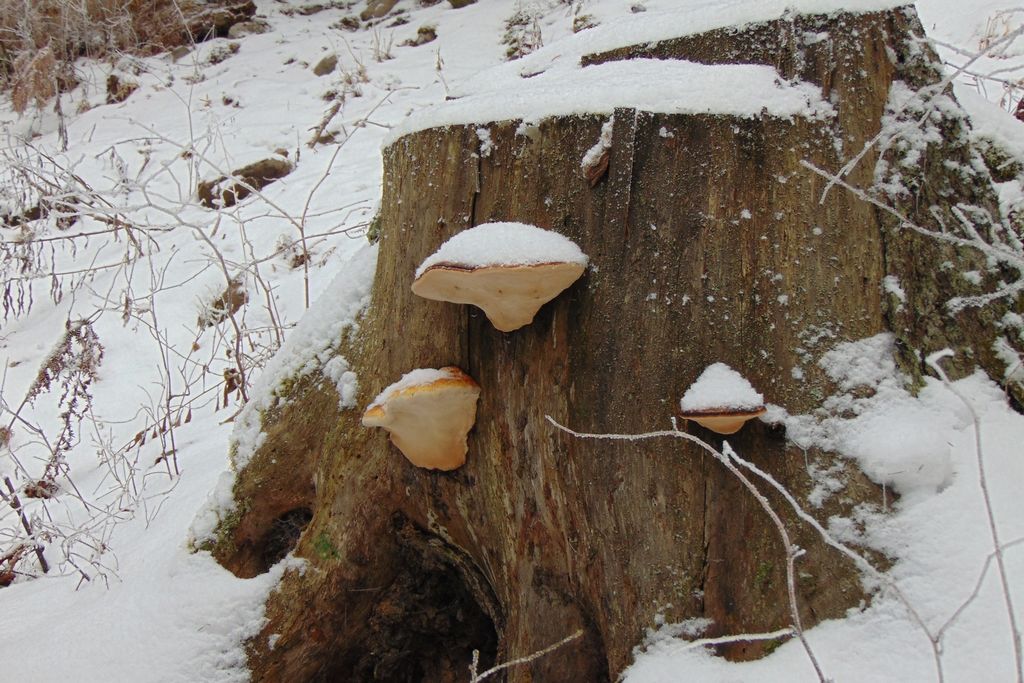
Bracket fungus as container – again, they’re abundant, especially in old forests, and can be harvested all year round as they are perennials.I used Red-Belt Conk (Fomitopsis Pinicola), but any good sized conk would work, Horse Hoof Fungus (Fomes fomentarius) being the most widespread and known.
A forked branch as handle – I’m confident that you’ll easily find this item in any forest.
Tools I used:
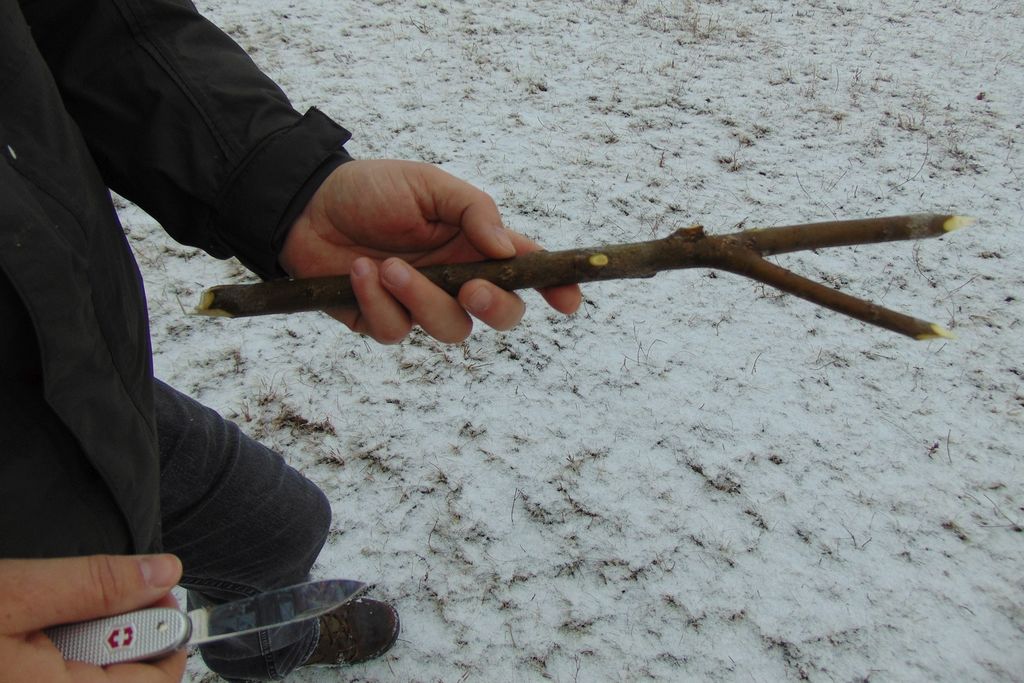
Pocket knife – any small folding knife would “cut it”, you don’t need nothing fancy
Lighter – or matches, or firesteel, or whatever means of fire lighting you prefer. Both are pretty basic, when it comes to everyday Carry.
Step 2: Assembling the Pine Resin Torch
Once you got the ingredients, start by carving a hole in the top of the conk, this will hold the resin a.k.a. Fuel, try making the hole as deep as you can without puncturing the bottom of the fungus, a deep hole fits more fuel and increases burn time; hole width also influences burn time: a wide hole decreases burn time because the fuel burns on a bigger surface, but gives more light.
Next step is to add a handle: sharpen the tips of the forked branch and push them against the conk’s back (the back being the side that was attached to the stump), take your trusty knife and drill holes where they left impressions then insert the branch’s prongs in the holes you drilled, use some force to push them in, you don’t want it falling off, trust me.
That’s it, the torch is complete, just add a handful of resin and light it up.
Step 3: Final Thoughts & Conclusions
A handful of pine resin will burn for a good half an hour but more clumps can be added along the way to keep the flame alive, one thing to look out for is that if you add too much it will overflow and start dripping fiery drops of liquefied resin that are relatively hard to put out, can severely burn your skin or clothes, or even start a forest fire, please be mindful of that.
The conk I used was fresh and living so it had a good amount of moisture in it, I figure this was the reason that despite burning resin in it for several hours it’s only burnt superficially, I’m confident that it could be used for days or even weeks before it burns trough.
All in all it was an interesting challenge, and I’m really curious on your input, how would you make this pine resin torch simpler to build/use or with even less materials or tools.
We love this sort of thing on Outdoor Revival and we’ll be bringing you a lot more of it over the coming months, if you enjoy making your own tools and gadgets in the wilderness let us know about it on our FB page, we’re also happy for article or review submissions, we’d love to hear from you.
Outdoor Revival – Reconnecting us all to the Outdoors