How to Make a Flint Knapping Indirect Percussion Tool
As an avid flint knapper I often like to make my own tools. One of the most popular materials is the copper for flaking and hammering tools which is, unfortunately difficult to locate in the sizes you need, and more so, expensive when you do, due to the current prices of of metals.
Here’s an inexpensive way to make a percussion flaking tool for under $10, from supplies you can find around the house, and the local hardware store. The best part is that the tips are replaceable so that when they wear out, you can insert another and keep going.
What is an Indirect Percussion Tool?
In case you’ve never heard of an indirect percussion tool, it’s a long stick with a piece of copper, or antler in the end that you strike with a hammer, making it more accurate in where it’s struck, and more precise in the amount of material that’s removed. It sits in the crease behind one knee (in the sitting position) and lays over top of the other. The tip of the tool is placed against the edge of your flint, which is held in the hand, and it’s struck on the shaft, thereby removing a precise amount of material.
Step 1: Materials
 Materials;
Stick of hardwood – roughly 18-24″ long and 1 1/8″ in diameter. Can use branch, or some doweling as I did .023 wire welding contact tips – used in welding, .023 has the smallest diameter hole so it is almost solid copper. Nut – Not certain of size since I found it in a pile of nuts and bolts in my shop, but not difficult to locate Small dowel – Should be roughly the size of the nut you use Tire Inner tube Rubber – To wrap around the area of the tool that will be struck
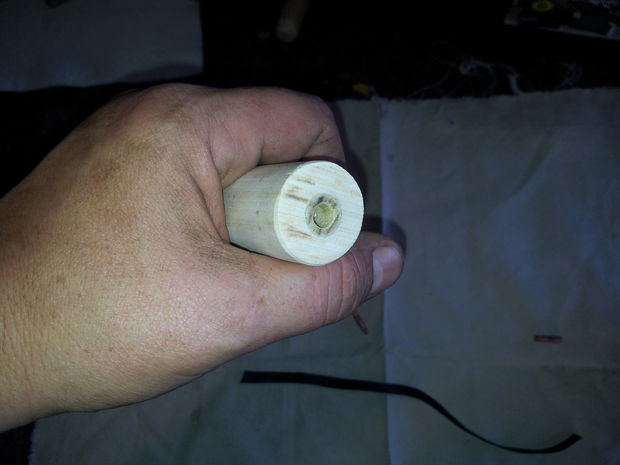
Step 2: Setting The Nut In Place
First you need to drill a hole, roughly 1/2″ deep into one end of the dowel. The diameter of the hole is dependent on the size of the nut you use. Mine was 27/64″ which was slightly smaller than the nut, allowing it to fit snugly at the bottom of the hole. You don’t need to be to tidy, since we’ll be finishing it off later, but you can give a light sanding to the inside of the hole to remove the burrs.
You don’t necessarily need to glue the nut in place if it fits snugly enough, however, a bit of 5 min. epoxy goes a long way to keeping it in place, especially with wear and tear from being impacted.
Step 3: Adjusting The Nut
You’ll want to screw the copper tip into the nut as the glue sets to make sure it’s sitting right in the hole. This is crucial for the next step where we create a bushing to hold the tip in place. An important note here; don’t screw the tip all the way down (as I initially did) as it could end up being glued in place with the nut. A little heat, and some work with a pair of pliers and the tip was free without disturbing the placement of the nut.
Step 4: Adding The Bushing
In order to keep the nut in place, and to prevent the tip from moving around you need to create a wooden plug to act as a bushing. Use a smaller piece of dowel the size of your nut, (the one I used was 7/16″ which was slightly larger than the hole I drilled). Drill a hole in one end, roughly 3/4″ deep and the diameter of the welding tip, then using a coping saw, cut off the bushing. Use a bit of sand paper to smooth and taper down the cut end then give it a nice smooth sanding all around. It should be very snug when pressed into the hole, almost to the point that it will need a bit of hammering to set into place.
Apply a bit of glue to the outside of your bushing then tap it into place, making sure that it lines up nicely with the nut hole. The leftover bushing that sticks out of the hole can be cut or sanded off once the glue dries.
***A really important thing is to ensure the grain of the bushing does not run in the same direction as the grain of the shaft. You can see in the second pic how the lines on the bushing are turned 90 degrees from those on the shaft. This will strengthen the end, preventing weak spots that can split when being impacted.
Step 5: Finishing It Off
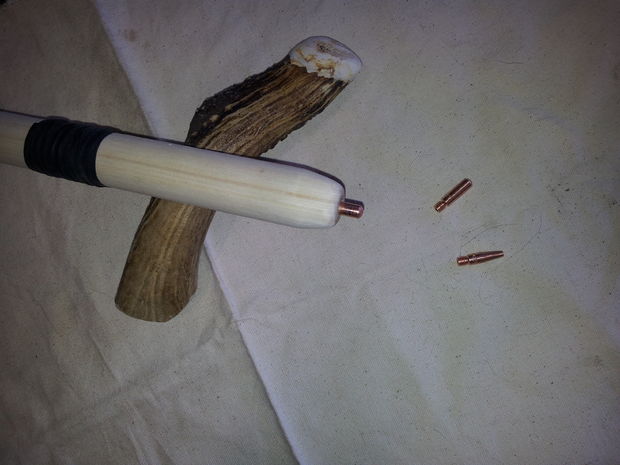
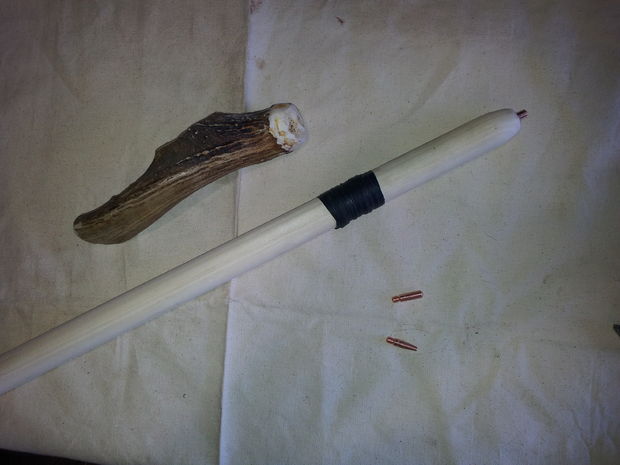
Once your glue has completely set, you’re done. I’ve tapered the end of mine, just a bit, but it’s not necessary. Another good addition was to wrap some strips of inner tube tire rubber around the location where I intend to hit the percussion tool. This will help prevent damage to the shaft, and also add a bit of shock absorption for you. Another great feature I added was to taper a few of the tips on the belt sander in order to create a bit of a ‘toolkit’ where I can switch them out for different effects while knapping.
That’s all there is to it. I hope you enjoyed my instructable and you can see more of my work here www.instructables.com