Heres how to make a Bushcraft knife based on the Woodlore model

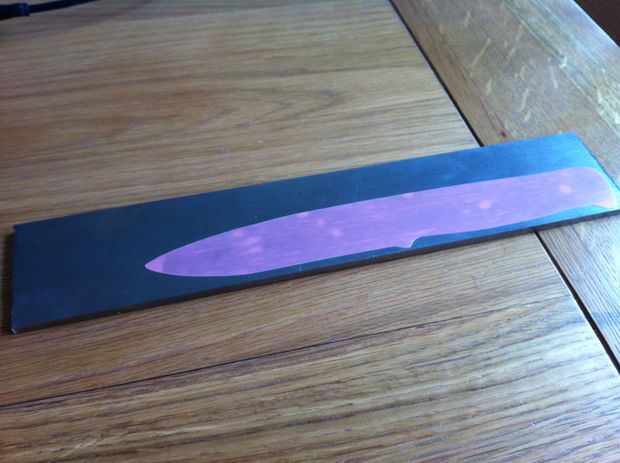
This is my attempt to make a Bushcraft knife based on the Woodlore model. I used 4 mm 01 carbon Steel which I obtained from Cromwell . I drew the template of the knife and had it cut out of vinyl on a cutter plotter, this was then applied to the steel blank ready for cutting out using a hacksaw and good files. .
.
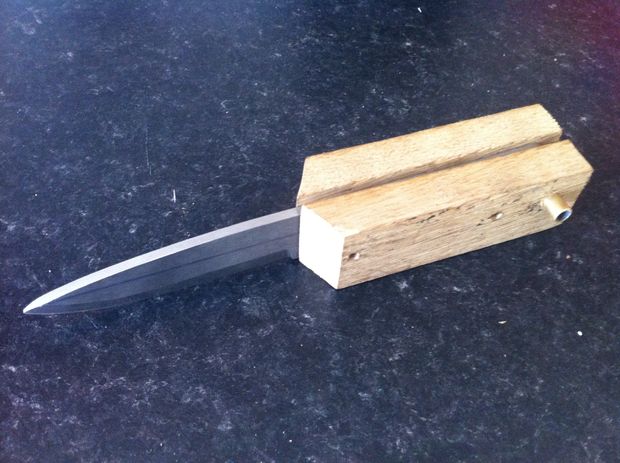
Step 1: Knife Blank Shaping
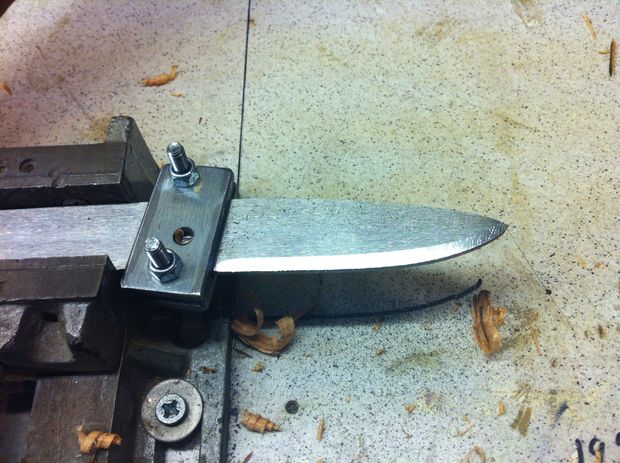
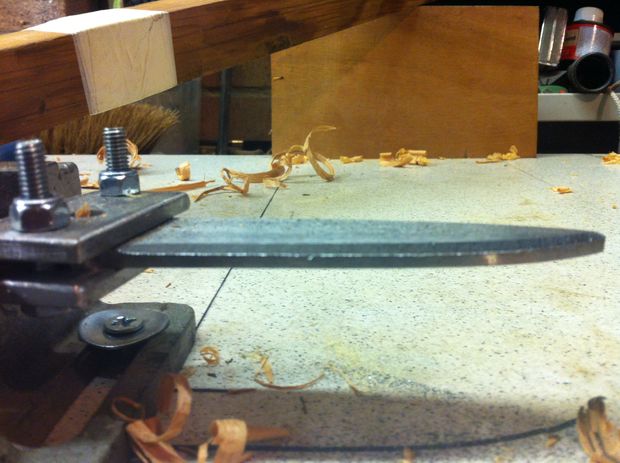

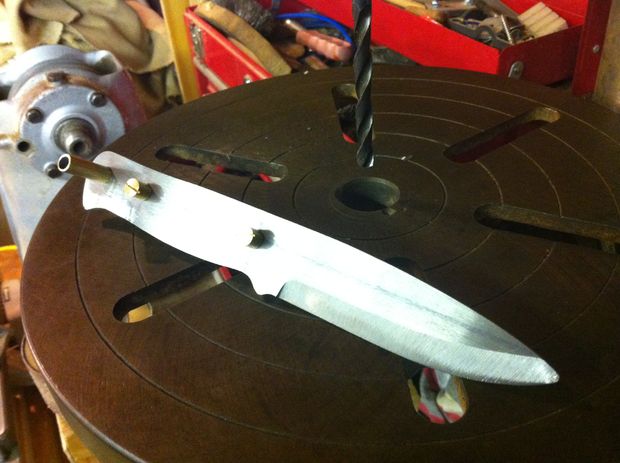
To create the V Bevel I first had to mark out the centre of the blade along its edge this ensured the cutting edge was positioned centrally along the blade. I had to make jig to file against, this consisted of a metal strap to clamp onto the knife, the strap allowed me to accurately file the correct angle of the end of the bevel next to the handle. to file the bevel along the length of the blade I clamped the blade in a drill vice, then I used a bit of trigonometry to build a rest at the back of my bench for my extended file to run against, I then filed the bevel leaving approximately .5mm on the edge of the blade, this prevents the edge burning away during the heat treatment process. prior to heat treating the blade I drilled the holes required for the scales and the cord tube.
Step 2: Heat Treating The Blade
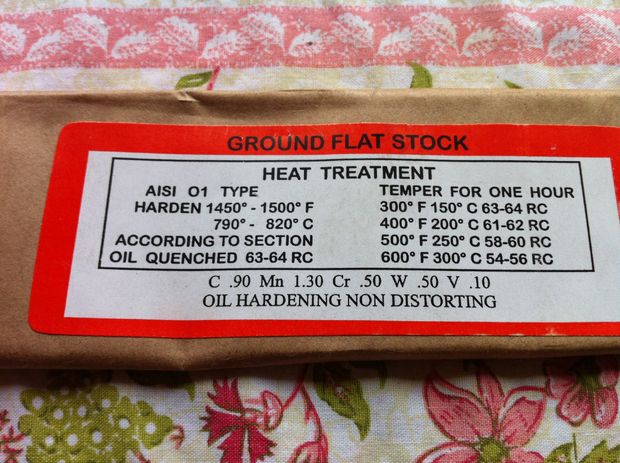
To heat treat the blade I used an Acetylene torch with a rosebud nozzle and heated the blade along the back edge to allow the heat to travel towards the blade edge, (do not apply heat directly towards the edge as it will get too hot, this will prevent you sharpening it as you will create a burr which will chip off leaving your blade rough) I heated the knife and kept checking for the critical temperature using a magnet. when it reaches critical temperature it stops being magnetic. when at the correct temperature I then quenched in pre heated oil until it had cooled. I only treated the blade of the knife as i didn’t want the handle to be too hard. I then Tempered the blade as per the instructions on the packet.
Step 3: Handle Scales
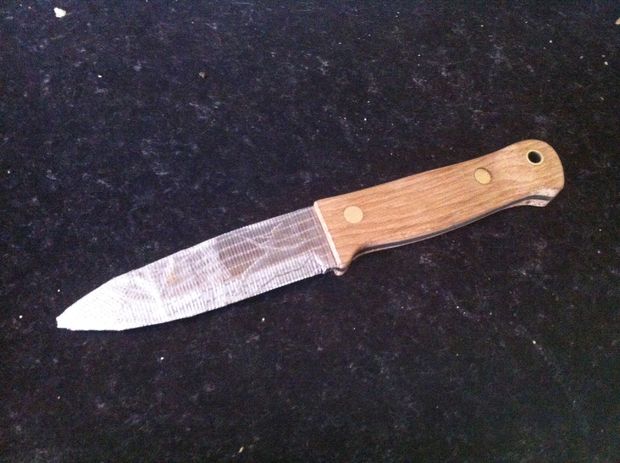
I used Oak for the scales on my knife, prior to fitting the scales I finished the leading edge of them as it is a bit tricky when the are fixed to the blade. to fix them I used epoxy resin and also purchased some Corby Rivets which you saw off the ends once fitted. I pre assembled the handles to make sure they fitted correctly then applied the resin and bolted together, I then clamped everything in the vice and waited 24 hours for it to thoroughly dry. once dry I taped up the blade to prevent damaging it and marked out the design of the handle on the scales I then sanded it using a belt sander clamped into the vice.
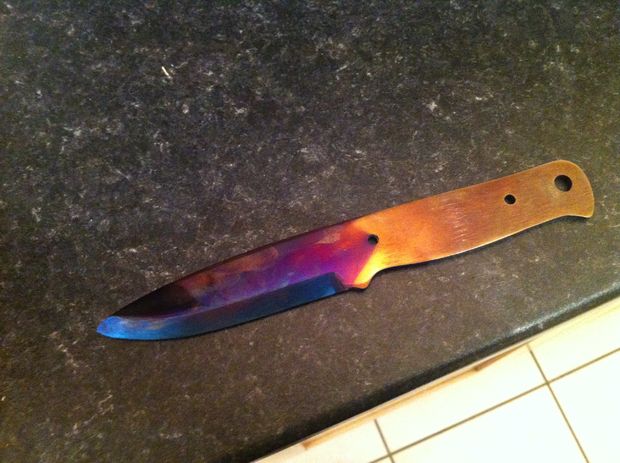
Step 4: Finishing
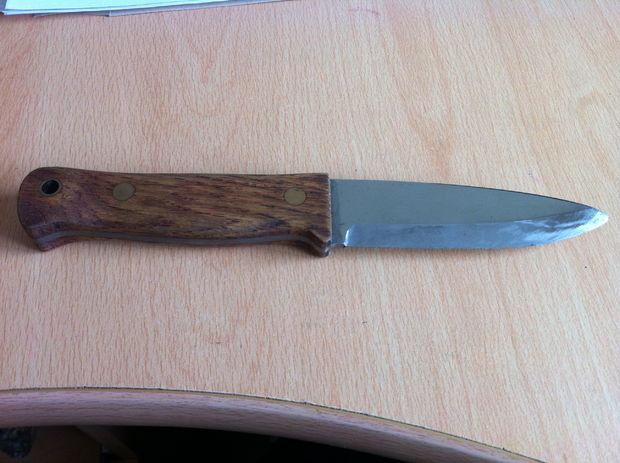
When the knife was finished and I was happy with the finish of the materials I then applied several coats of Wallnut oil to the scales and sharpened the knife edge using a Diamond sharpening system. I am now in the process of making a leather sheath which I will post soon, Thanks for reading I look forward to hearing your responses.