Love This! Birch Tar Resin For Paleo Crafts And Tool Making
For anyone that follows my instructables, you’ll know that I have an affinity for traditional tool making and paleo/meso craft stemming from my childhood with a parent who worked for the Museums of Canada. I’ve delved, like many, into weapon making such as the bow, atlatl, flint knives, etc, but found that these items represented only a nominal percentage of what early humans were capable of. Many of the greatest advancements, made by early humans, weren’t the tools themselves, but the materials that went into tool making, and none, in my mind, is more profound than the advent of resin.
The use of resin dates back to the late palaeolithic era, and specifically birch tar is found in archaeological finds from all over the world. More than just a glue, it was used to seal boats and water containers, a water proofing material for shelters, an antibacterial for wounds, an antimicrobial for treating water, a flammable fire source, and was even known to be used as a chewing gum, the suggestion being that it was used to prevent tooth decay.
Pine Vs. Birch;
Many paleo crafters are known to use pine resin in their works, and it does function rather well, but there some serious advantages to using birch. For starters it doesn’t need to be used solely as a gum. Pine tar needs to be reduced, over a fire until it becomes a gum and is worked much like putty. Birch tar, on the other hand, can be left as a syrup, applied like a liquid glue and let to set as the natural ‘turpentine’ evaporates, albeit it can take a week or more to do so. It has a higher boiling point than pine tar does, and so arrow and spear points were less likely to come loose on extremely hot days, but most of all, it doesn’t become brittle like pine tar and retained some flexibility.
Gathering Birch Bark;
Generally, when I’m gathering birch bark, for resin making, I prefer to get my material from dead or ground fall trees. There are two reasons; 1) I don’t disturb a live tree and risk it getting infected by taking its bark, and 2) The bark tends to be much dryer and produces more resin with less turpentine.
**Note on conservation** If you intend on gathering from a live tree, the best time to collect it is in the spring or summer when there is a lot of sap in the bark, allowing it to peel off in layers. When you remove bark, you want to make sure you leave a few layers on the tree, AND NOT, peel it down to the bare wood which could cause an infection in the tree thereby killing it. If you’re collecting in the fall or winter, stick with dead fall trees, where bark removal isn’t an issue.
**Caveat** This instructable uses fire and hot materials, and though I shouldn’t have to tell anyone to be careful, I wouldn’t be doing my due diligence if I didn’t. If you’re building a fire in the city, use a fireplace with a good spark arrestor around it and wear gloves to protect your hands.***
Step 1: Tools And Supplies
Tools;
- Good sharp knife
- hammer
- awl
- Fireplace with Spark arrestor
- Gallon paint can with lid
- quart paint can, lid optional
Supplies;
- Birch Bark (enough to fill gallon paint can)
- Firewood
- plant fiber (will give further details later in instructable)
Step 2: Premise Of Tar Extraction And Prepping Your Materials
Premise of Birch Tar Extraction;
Basically, birch tar is extracted from bark by slowly ‘baking’ it in an airtight container, allowing its gasses to escape through the top, and letting it’s constituents drip into a lower container that is kept out of the heat. In prehistory, this was done using clay pots, but today we can do it much more effectively using metal. The end result is a thick syrupy liquid that is as flammable as gasoline (until reduction takes place) and as sticky as gum.
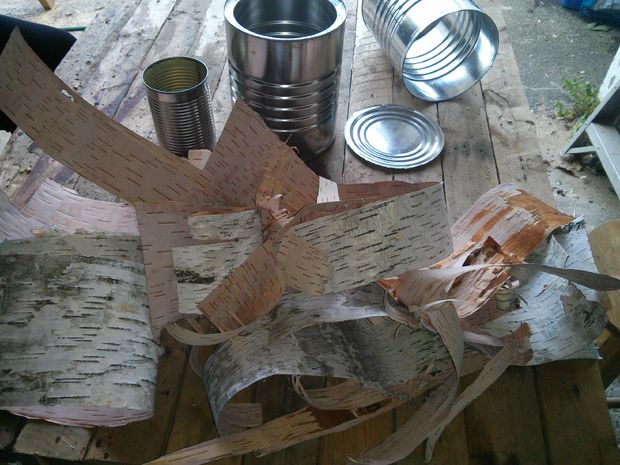
Prepping Your Materials;
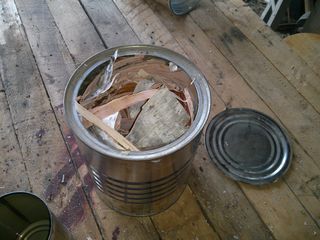
As you can see from the photo, I didn’t use paint tins for mine, as I didn’t have any on hand, and ended up using old gallon coffee tins. I do, however recommend using the paint cans since keeping them air tight is a large concern, however if all you can find is recycled tins, they can be made to work. For mine, I simply cut the bottom out of a second tin and used it as a lid. Coffee tins come with a wide inner lip that provides a good, though not perfect, seal for air. For the smaller container, I simply used an old soup tin. I didn’t bother burning the plastic liner out of it as it would happen anyway during extraction, and wouldn’t affect the end product.
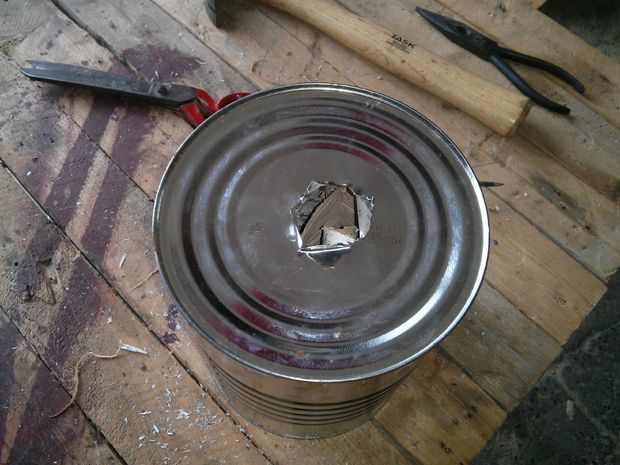
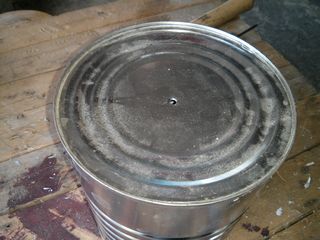
For starters, you’ll need to cut an ‘X’ in the bottom of your gallon tin and bend the points of it outward. This provides an outlet for the tar to drip into the lower container. Next you’ll want to punch a small hole in the lid, roughly 1/8″ wide. This is to vent the flammable gasses that will build up in the can. Interestingly, these gasses can actually be used to power small engines in the form of a wood gasifier, but that’s another instructable entirely. Finally, you need to fill your can with birch bark. I’d recommend layering it and rolling it up like a newspaper before inserting it as it will allow your tar to drip to the bottom more freely.
Step 3: Setting Up The Cans
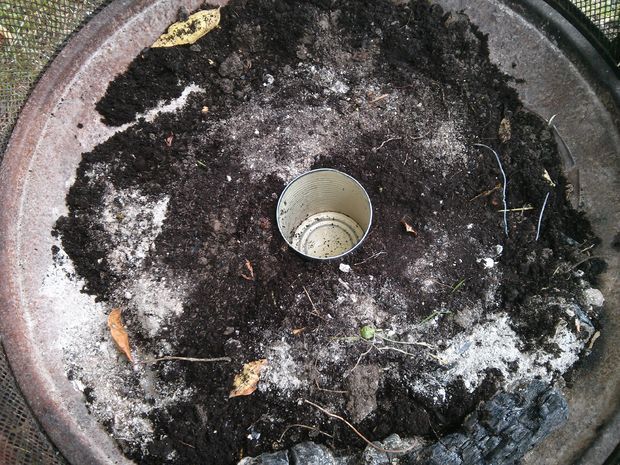
You need to set your quart can in the bottom of your fire pit, and fill around it with dirt and/or ash as we need to keep it out of the fire. The dirt should reach the top of the lip, but don’t be to concerned if some dirt falls in. It really won’t affect the end product.
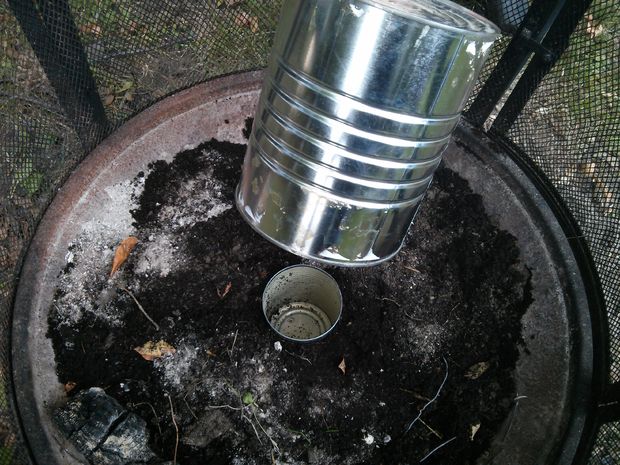
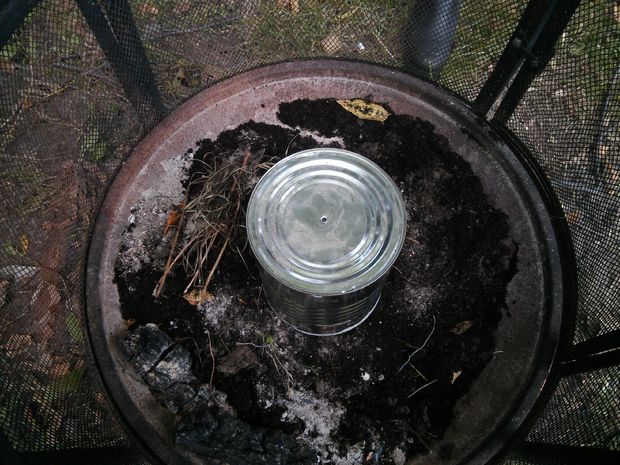
Next, set the gallon can on top, with the ‘X’ you cut into its base over the quart tin and press the dirt all around its base. This is important since we don’t want any flames and heat getting into the bottom tin or else it could ignite and you could lose your whole batch. If, by chance, it does ignite, it will burn up through your birch bark but don’t worry, there are ways of putting it out, if it does happen, without ruining everything which I’ll detail later.
Finally, build your fire, as per normal, surrounding the can but being careful not to tip it over.
Step 4: Judging The Cooking Time And Fire Prevention
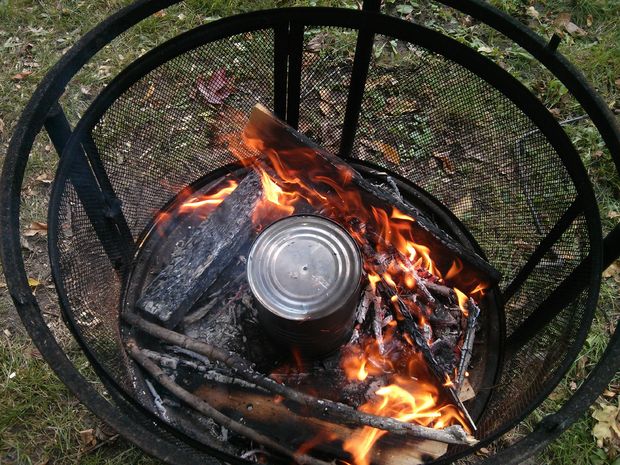
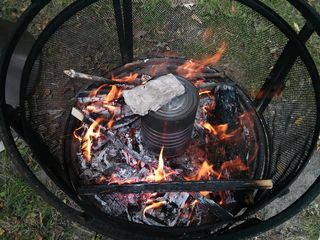
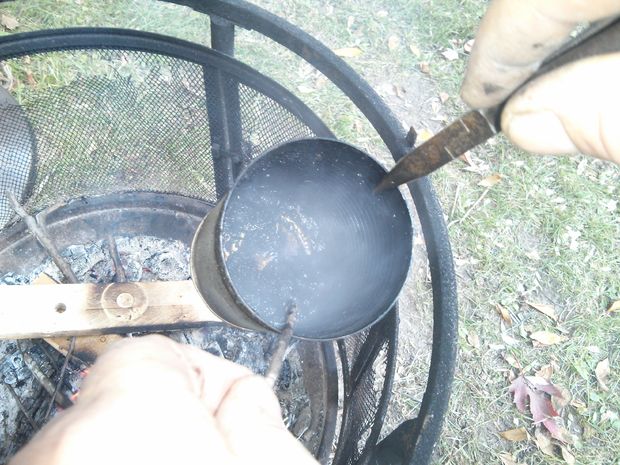
As your fire takes hold, start to move it away from the can, but allow it to surround it. Your can shouldn’t be in direct flame, only licked by it. As you continue to cook, observe the top hole where the smoke comes out. It will intensify then slowly taper off as the bark becomes charred and the tar is fully extracted. You should also start seeing some resin build-up around this same vent hole.
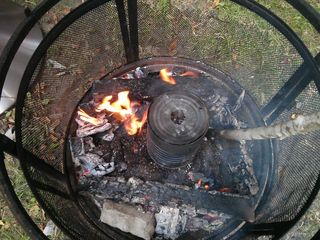
Since my lid wasn’t completely airtight, I put a rock on to to hold it down better, but did suffer some leakage which wasn’t to dramatic. The difference between a perfectly sealed container, and a leaky one is negligible in the amount of tar extracted. You can see, in the fourth pic how some of the resin is building up around the edge of the lid.
In Case of Flame up;
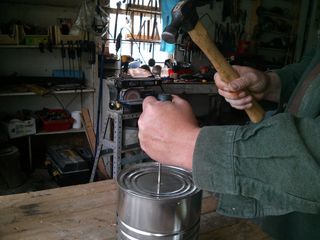
If you see flames coming out of your vent hole, then your bark, your tar or both are on fire and you need to arrest that immediately or you’ll lose your batch. There are two ways to deal with flame up. The first is to completely cut off its oxygen supply. You can do this by plugging the vent hole with a small stick, or by pouring dirt on top of the lid to smother any sources of air, however you should uncover it as soon as the fire is out to prevent gas build up in the tin. The second is to introduce a back draft, especially if it’s the tar that’s on fire. Take a large stick and strike the top of the tin. Its flexible surface will act as a membrane and force the gas downward, and (hopefully) extinguishing the flame. In any case, you should move the fire farther away from the tin to prevent it happening it again. Remember, you only want to bake the bark, so it should never be in direct flame.
Step 5: Judging When It’s Done
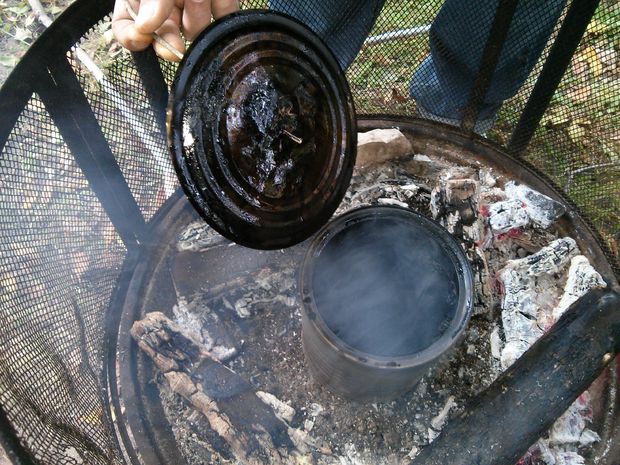

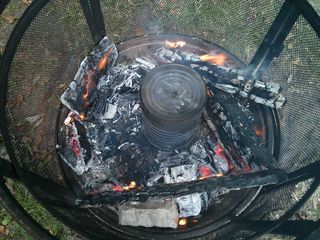
If you’re using a sealed paint tin, it can be a bit difficult to open it and see if your bark is depleted. One easy way to tell is to observe the smoke. During the baking process the smoke will be thick and white, however as the bark gets close to being spent, it will put out far less. Overall time should be close to 30 minutes but don’t worry, at this point you can’t ‘over bake’ your bark.
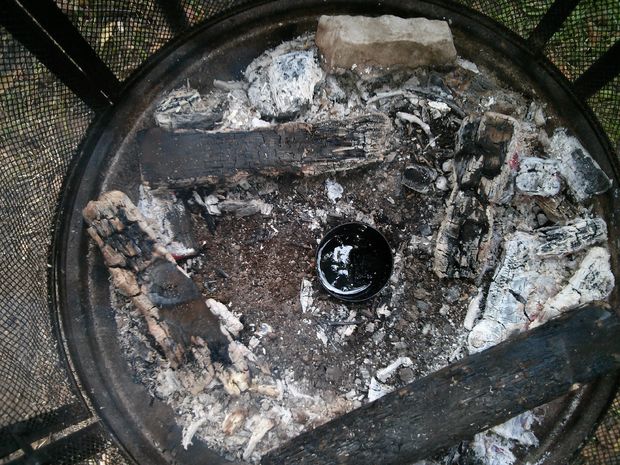
When your bark is depleted, you can begin to move away the fire and reclaim your quart container. I would recommend waiting 20-30 minutes for it to cool, however if you’re impatient, like I am, you can use a pair of pliers to grab it.
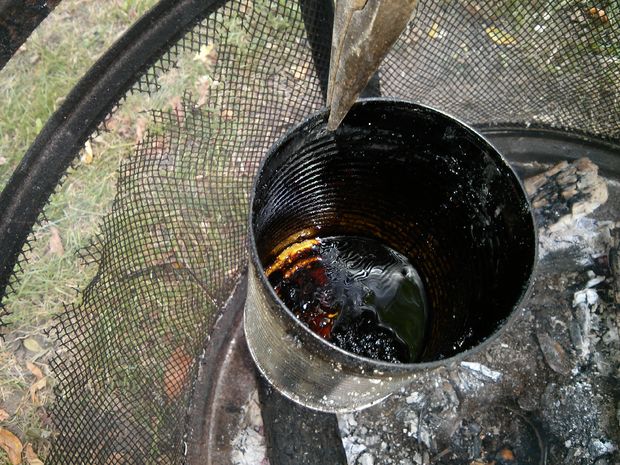
Finally, use a small stick and clean out any debris that may have fallen into the container, or if you have a lot of impurities in it still, you can transfer it to another tin for final processing. While still warm it should pour like melted butter.
Tar, at this stage can be stored indefinitely and you don’t need to reduce it anymore. Especially if you intend on using it in applications where its liquid form would be preferable such as waterproofing. However, if you intend on using it as a resin, you’ll need to refine it a bit more.
Step 6: Reducing And Refining
Refining;
To be used as a glue, you’ll need to add a few ingredients to your tar. The first is charcoal, and fortunately, you should find plenty left over from your fire. Crumble it up into a fine powder and slowly add it to your tar at a ratio of 1 gram of charcoal to every table spoon of tar. You can grind it using a mortar and pestle, but I like to do it with my hands. Don’t worry if some larger chunks get in as you’ll be stirring often and will break them up as you go.
The second ingredient is fibre. Plant fibre will turn your tar into a type of fibreglass, adding to its strength dramatically. Any plant fibre will work, however for mine I cut up some jute twine, broke up the fibres and cut them into very small 1/8″ pieces. How much you use is a matter of preference. More fibre means stronger glue, but the end product is lumpy, while less fibre means a smoother finish yet not quite as strong. I’d recommend adding small amounts slowly as you go.
Optional Ingredient;
In some archaeological finds, red ochre was used as a hardening agent to replace charcoal. I have used it in the past but found it left my resin gritty. Still, it does work well and I’d suggest you try it at least once if you have enough bark.
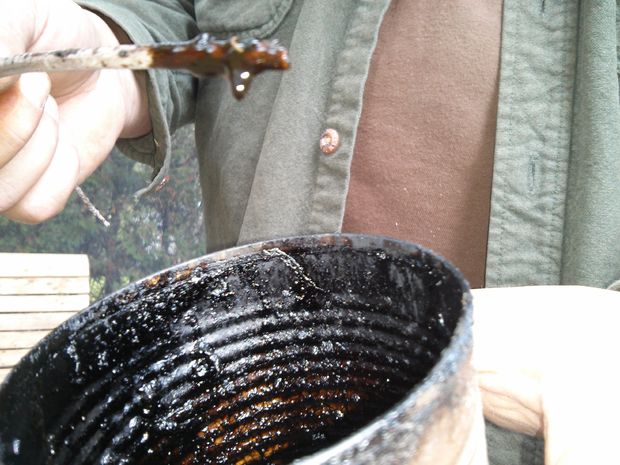
Heating and Reducing;
You’ll need to recover your fire, but this time keep it very small. Put your tin beside the fire, but not in direct flame and stir it constantly. Be very careful. Your tar is extremely flammable and a flare up will burn it. if it starts to bubble and smoke excessively, pull it farther away from the heat source.
Don’t Burn it;
There are four stages of done; gel, gummy, hard and burnt, and the line between hard and burnt is very fine. I prefer to leave my tar as a gel so that it can be smoothed and used as a paste glue. The disadvantage is that you’ll need to let it dry which can take upwards of a week. Many people prefer the gummy stage where it is kneaded like clay. In this form it has less tack and bonds more like playdough, though eventually it will harden. The third stage is hard where lumps need to be ‘melted’ over a fire before it can be used. This is the best way to transport your resin or to store it for long periods. The final stage is burnt. Basically, your tar is useless grains of carbon and you’ll need to start over so be very careful in the reducing process.
Step 7: Finished
<
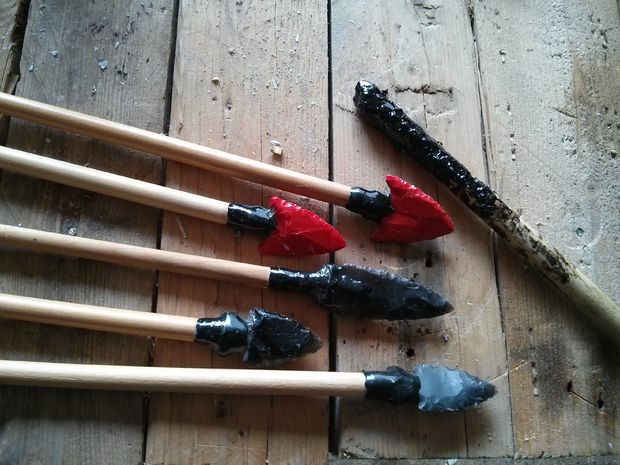
That’s it. It’s a tricky process, and requires a lot of supervision, but the end product is well worthwhile. Birch tar has almost endless applications and, in my mind, is one of the reasons that man is the successful hunter gatherer he/she is today.